> ## Documentation Index
> Fetch the complete documentation index at: https://wisdomai-add-trigger-agent-api.mintlify.site/llms.txt
> Use this file to discover all available pages before exploring further.
# Turn Answers into Stories
Stories are data dashboards created from chat answers. You can create Stories directly from Chat Responses or from the Story Editor interface. With Stories, you can:
* Create dynamic narratives using your data.
* Customize layouts and visuals from responses to suit your audience.
* Share updates that **automatically reflect the changes** in your datasets.
Follow this guide to start building Stories and communicate insights clearly and effectively.
## Create Stories from Chat Responses
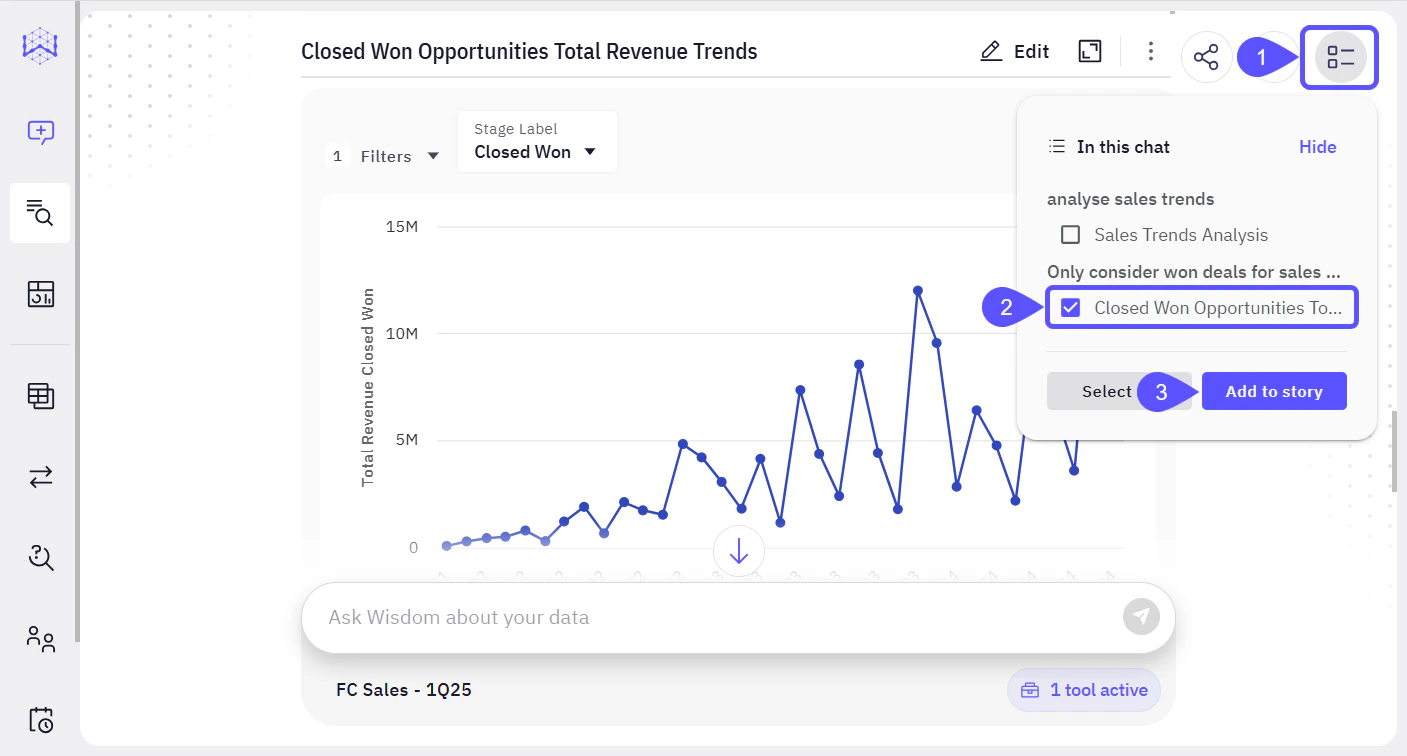
1. Within your chat window, click on the **In this chat** contextual menu icon.
2. Select one or more **answers** that you would like to include in your Story.
3. Click on **Add to story**.
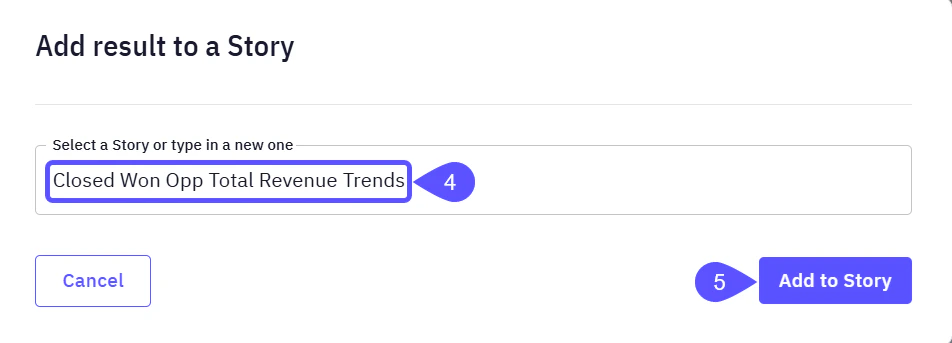
 4. In the modal window that opens, type the **title** of the new story or select an already created one.
5. Click the **Add to story** button. Your Story is now created and saved.
4. In the modal window that opens, type the **title** of the new story or select an already created one.
5. Click the **Add to story** button. Your Story is now created and saved.
 ## Create Stories from the Story Editor
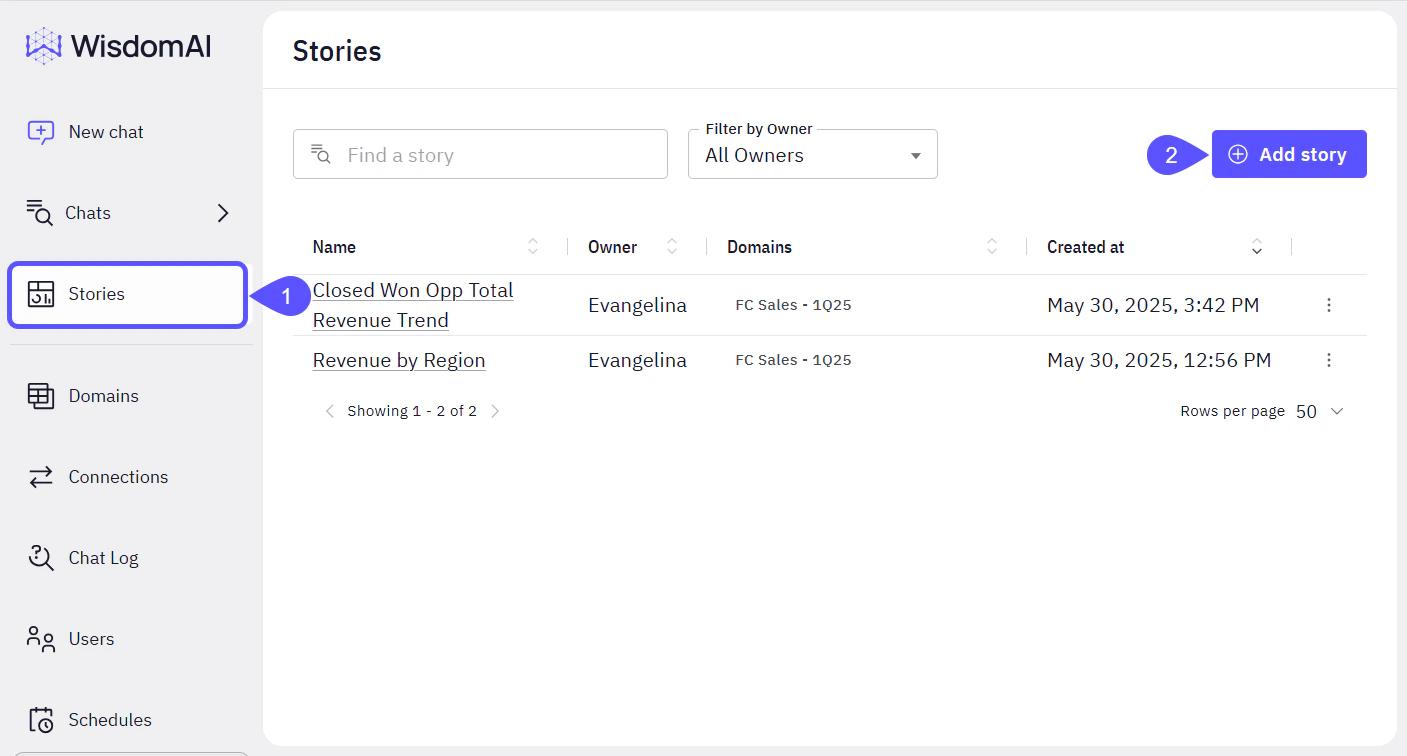
1. Open **Stories** in the left sidebar.
2. Click on the **Add Story** button.
## Create Stories from the Story Editor
1. Open **Stories** in the left sidebar.
2. Click on the **Add Story** button.
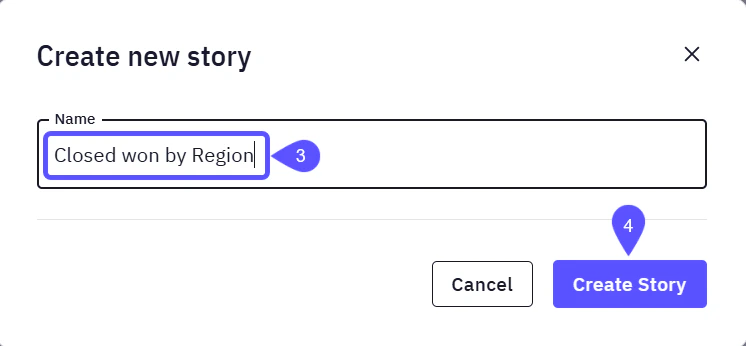
 3. Add a relevant **name** to your Story.
4. Click on **Create Story**.
3. Add a relevant **name** to your Story.
4. Click on **Create Story**.
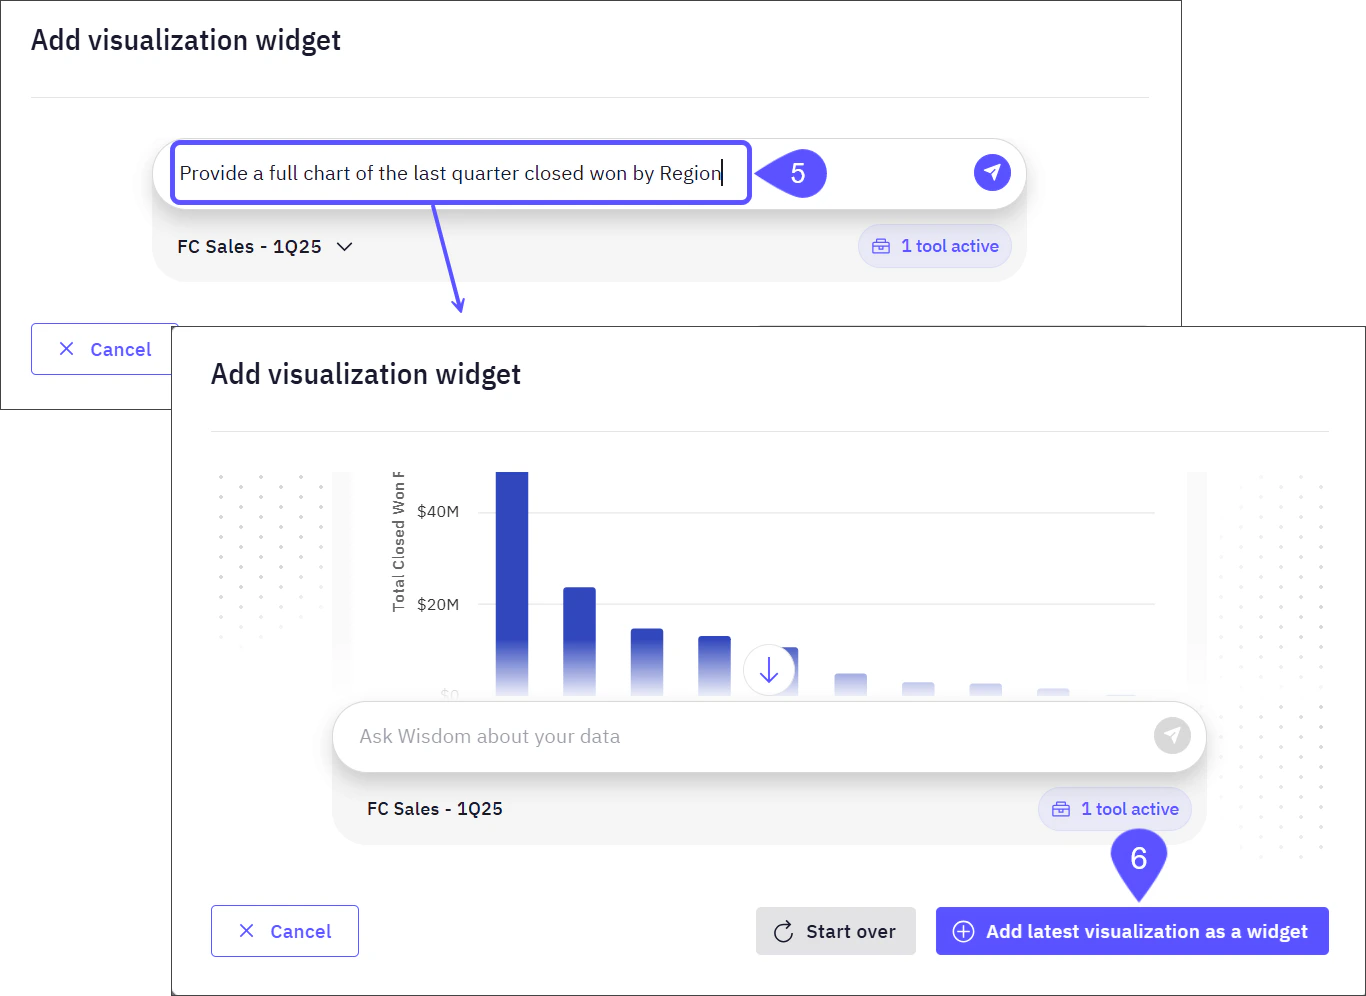
 5. The **Add visualization widget** modal window will open. In this window, you can ask WisdomAI a question about your data in natural language. Based on your question and query, WisdomAI may generate a visual representation, such as a chart or graph that you can review and add directly to the Story.
6. Click on the **Add latest visualization as a widget** button to save the response (a chart in this example) in the Story.
5. The **Add visualization widget** modal window will open. In this window, you can ask WisdomAI a question about your data in natural language. Based on your question and query, WisdomAI may generate a visual representation, such as a chart or graph that you can review and add directly to the Story.
6. Click on the **Add latest visualization as a widget** button to save the response (a chart in this example) in the Story.
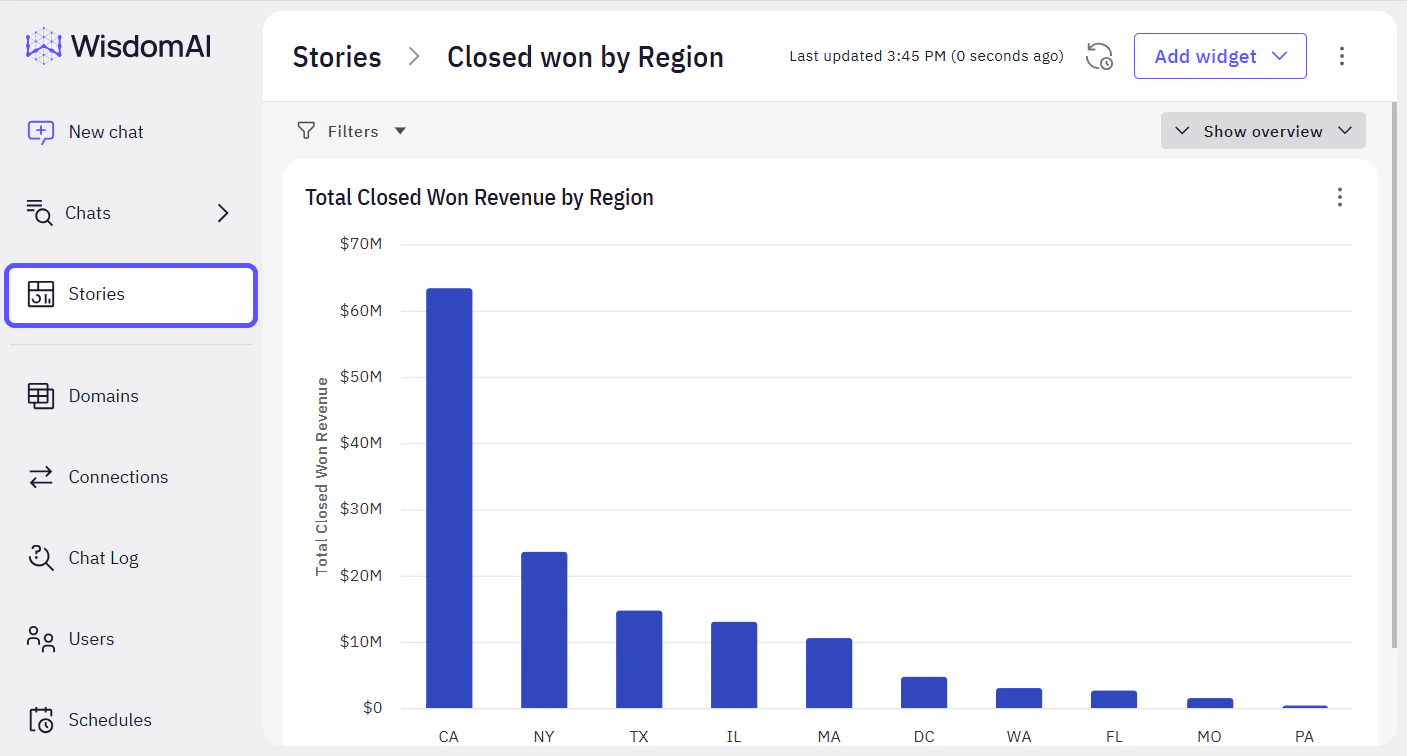
 Your Story is now created and saved.
 ## Next Steps
* [Schedule Story Notifications](/using-wisdom-ai-everyday/schedule-story-notifications)
* [Share Stories and Set Access Control](/using-wisdom-ai-everyday/share-stories-and-set-access-control)
## Next Steps
* [Schedule Story Notifications](/using-wisdom-ai-everyday/schedule-story-notifications)
* [Share Stories and Set Access Control](/using-wisdom-ai-everyday/share-stories-and-set-access-control)