> ## Documentation Index
> Fetch the complete documentation index at: https://wisdomai-add-trigger-agent-api.mintlify.site/llms.txt
> Use this file to discover all available pages before exploring further.
# User Management
This article will guide Administrators through effective user management within WisdomAI, focusing on how to invite new users and assign permissions carefully based on user responsibilities.
## Invite Users
As an administrator, you can invite additional users to your WisdomAI environment:
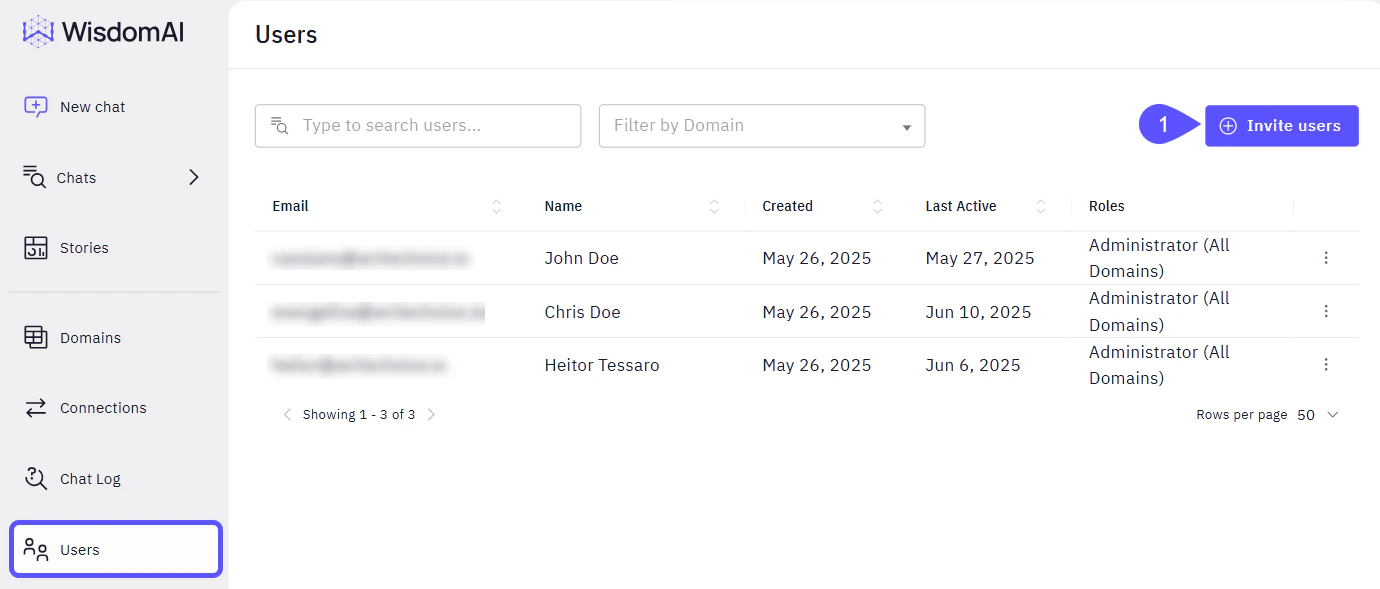
1. Navigate to **Users** > **Invite Users**. The Invite Users modal window will open.
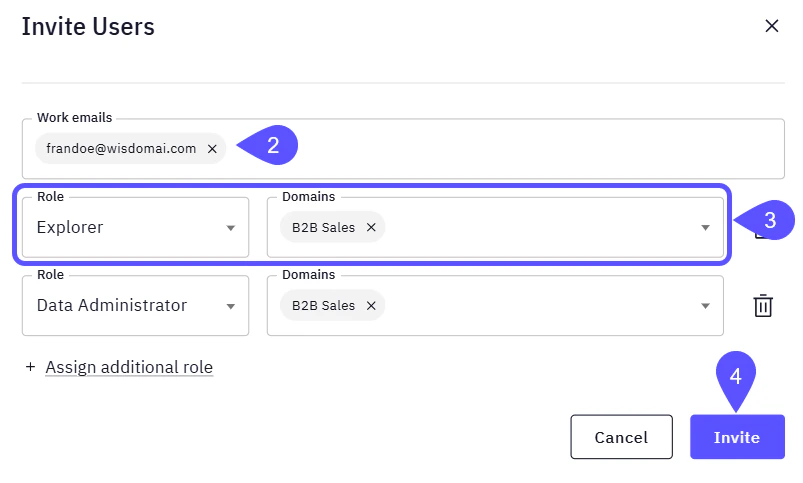
 2. Enter the **email address** of the person you want to invite.
3. Assign the appropriate **role** and the corresponding **Domain**.
* You can assign more than one Role and Domain to a user.
* To delete any record, click on the bin icon.
4. Click **Invite**.
Assign roles carefully based on user responsibilities. Role-based access control ensures users only access the data and features they need.
2. Enter the **email address** of the person you want to invite.
3. Assign the appropriate **role** and the corresponding **Domain**.
* You can assign more than one Role and Domain to a user.
* To delete any record, click on the bin icon.
4. Click **Invite**.
Assign roles carefully based on user responsibilities. Role-based access control ensures users only access the data and features they need.
 ## Assign Roles
Whether you need to add or change a user's role, you can do it from the users list.
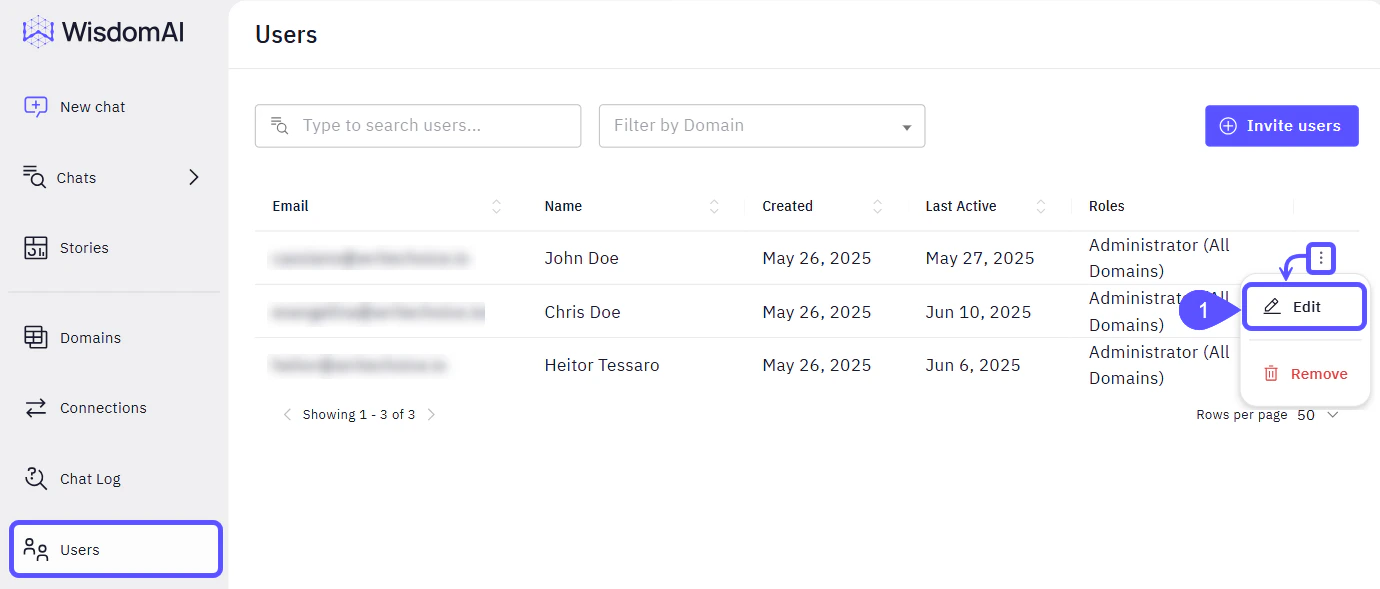
1. Navigate to **Users** > Find the user to assig/change the rol, click on the kebab menu (three vertical dots) on its row, and select **Edit**. The Edit User modal window will open.
## Assign Roles
Whether you need to add or change a user's role, you can do it from the users list.
1. Navigate to **Users** > Find the user to assig/change the rol, click on the kebab menu (three vertical dots) on its row, and select **Edit**. The Edit User modal window will open.
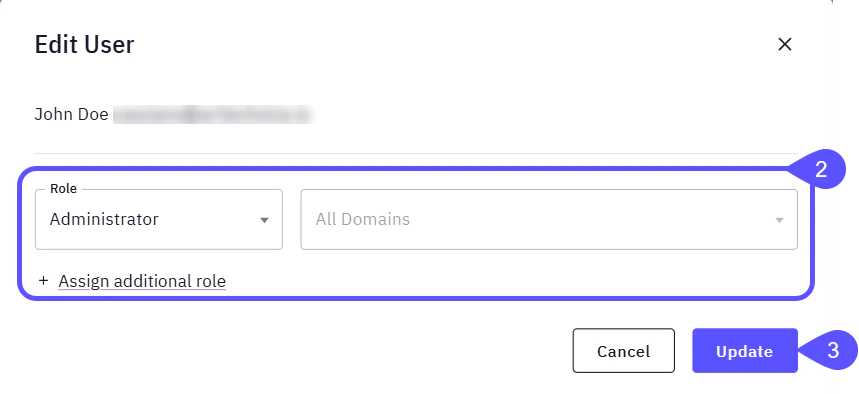
 2. **Edit** the Role/Domains information or **assign an additional Role**.
3. Click **Update**.
2. **Edit** the Role/Domains information or **assign an additional Role**.
3. Click **Update**.
 ## Next Steps
* [Role Capability Matrix](/manage-account/access-management/role-capability-matrix)
* [Row-Level Access Control](/manage-account/access-management/row-level-access-control)
* [Supported Data Sources](/getting-started/supported-data-sources)
* [How WisdomAI Works](/getting-started/how-wisdom-ai-works)
* [Basic Tutorial Connect and Test](/setting-up-wisdom-ai/basic-tutorial-connect-and-test)
## Next Steps
* [Role Capability Matrix](/manage-account/access-management/role-capability-matrix)
* [Row-Level Access Control](/manage-account/access-management/row-level-access-control)
* [Supported Data Sources](/getting-started/supported-data-sources)
* [How WisdomAI Works](/getting-started/how-wisdom-ai-works)
* [Basic Tutorial Connect and Test](/setting-up-wisdom-ai/basic-tutorial-connect-and-test)